The most common wallet is MetaMask, which is a simple browser extension and mobile app that allows you to store, send and receive crypto and NFTs. It also allows you to connect to most Web3 apps.
If you’d rather follow along with a video walkthrough, click HERE.
To use on your computer, go to the MetaMask website and download the browser extension.
For mobile, download the app on the App Store.
If this is your first time, you will need to use the “Create a Wallet” option. Follow the prompts, and choose a password. Be sure to write your password on a physical piece of paper, and do not screenshot or store it on your computer (unless in a secure password manager).
You will then be given a secret recovery phrase aka "Seed Phrase", which is a series of 12 words chosen at random which identify your wallet. These words are vitally important to protect, as they are how you can access your wallet from any device. Do not share these words with anyone, and keep a physical copy somewhere safe.
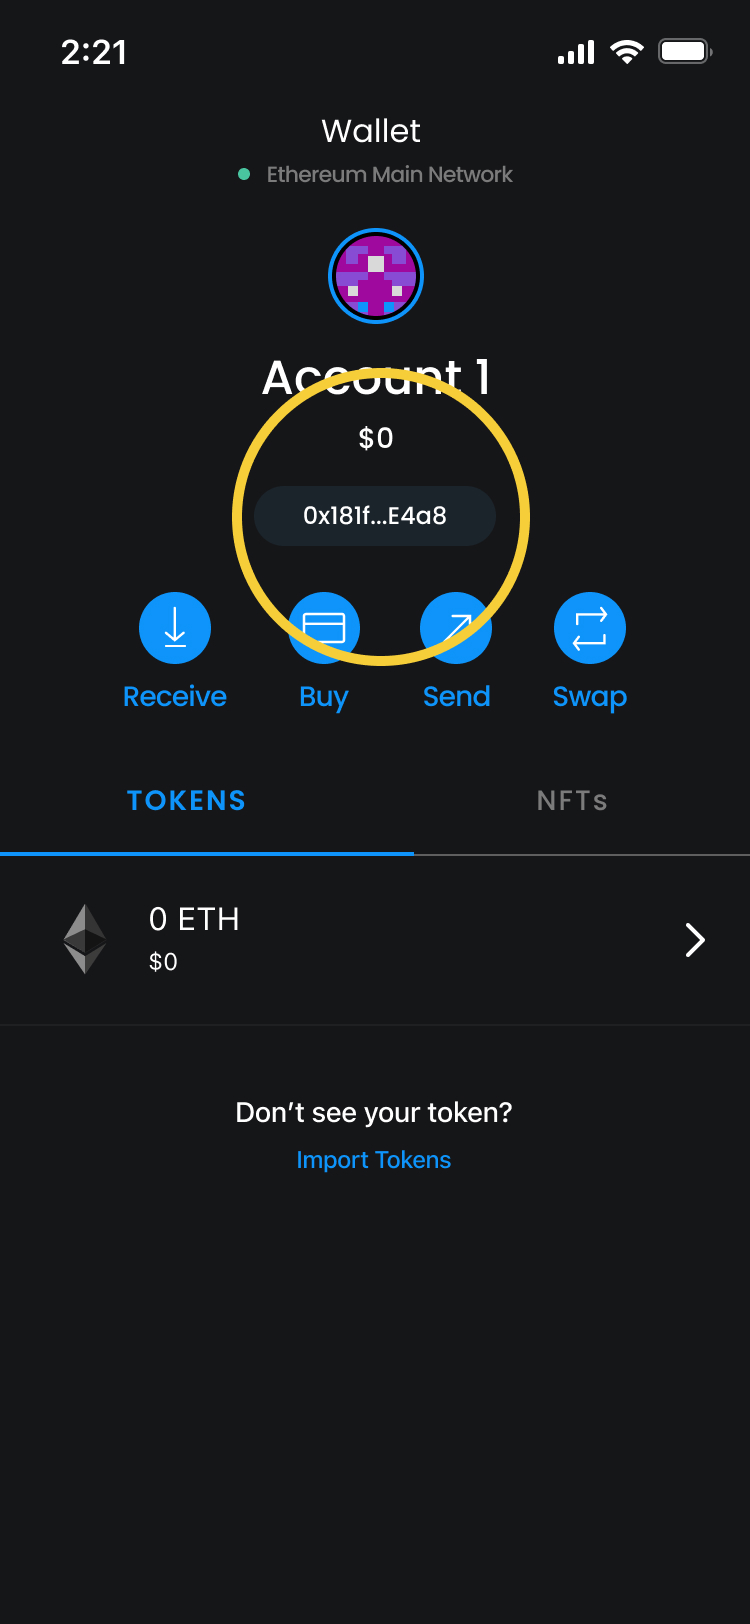
Unlike your secret recovery phrase aka "Seed Phrase", your public address can be shared to allow people to send you crypto, NFTs or other tokens. Just click on your address, and MetaMask will automatically copy it to your clipboard, and you can paste it wherever you need (in a message to a friend for example). You can find your public address (this is the number that starts with 0x… it acts like an email address—it’s the way for people to find one another, send or receive tokens, or log in to a Web3 destination.) here:
**Not financial advice: do your research before buying crypto, including on potential tax implications.**
Now that your wallet is set up, you’ll want to purchase Ethereum (“ETH”), a type of cryptocurrency that is necessary to buy most NFTs or make other transactions. There are 2 main ways you can do this:
If you’d rather follow along with a video walkthrough, click HERE.
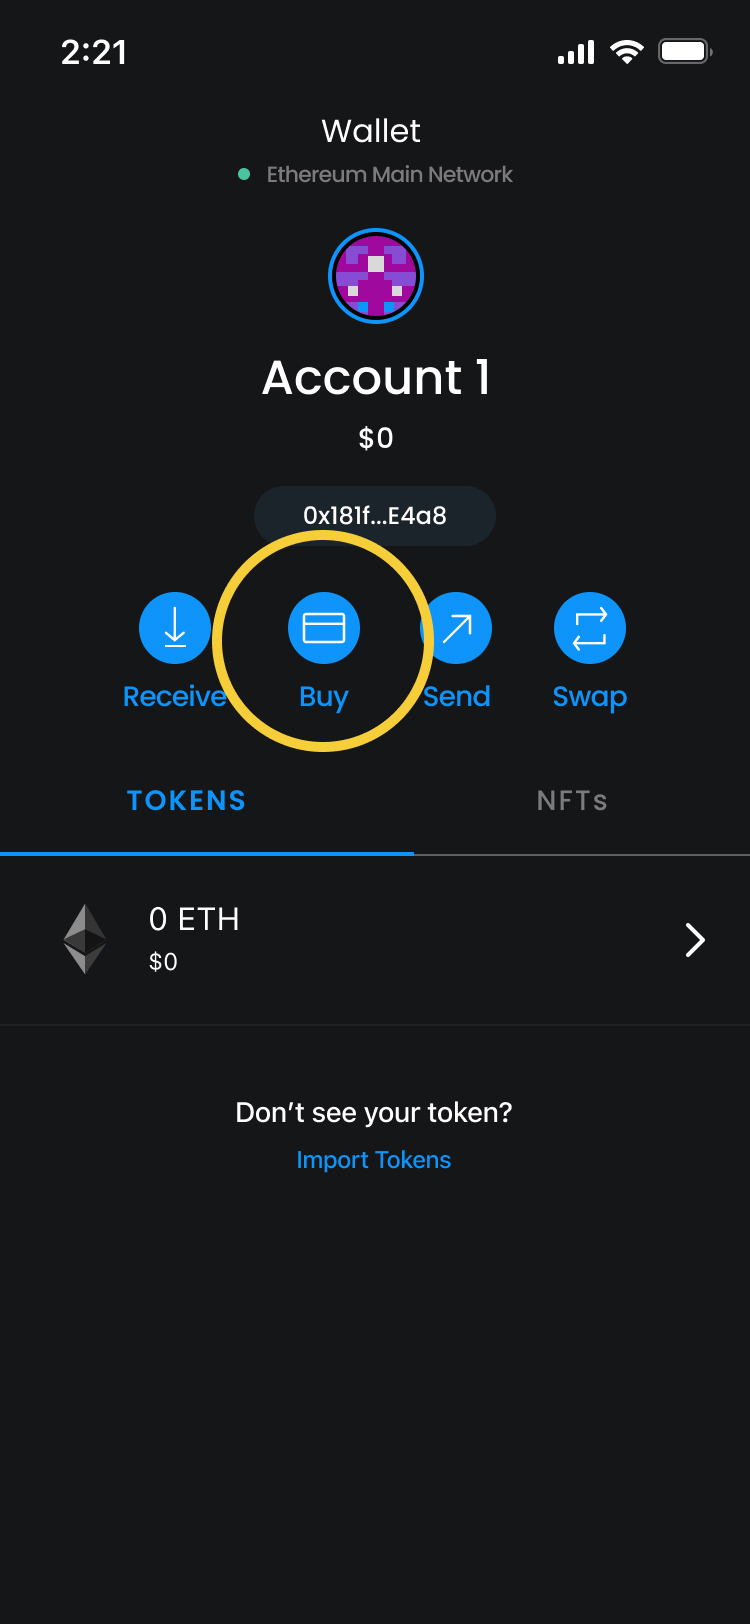
- In MetaMask: Since you already have your MetaMask set up, this might be the simplest way to get ETH in your wallet. Just click the “Buy” button, and you will have the option to purchase ETH using Apple Pay, a debit card or a bank transfer.
- Buy on an Exchange: You also have the option to purchase ETH from an exchange such as Coinbase. You’ll need to set up an account for these platforms and connect your bank account or debit card. Once you have purchased ETH on the exchange, simply send it to your wallet using your public address on your MetaMask. Note: in some states, you will need to purchase on an exchange, as MetaMask only operates in certain areas.
**Not financial advice: do your research before buying crypto, including on potential tax implications.**
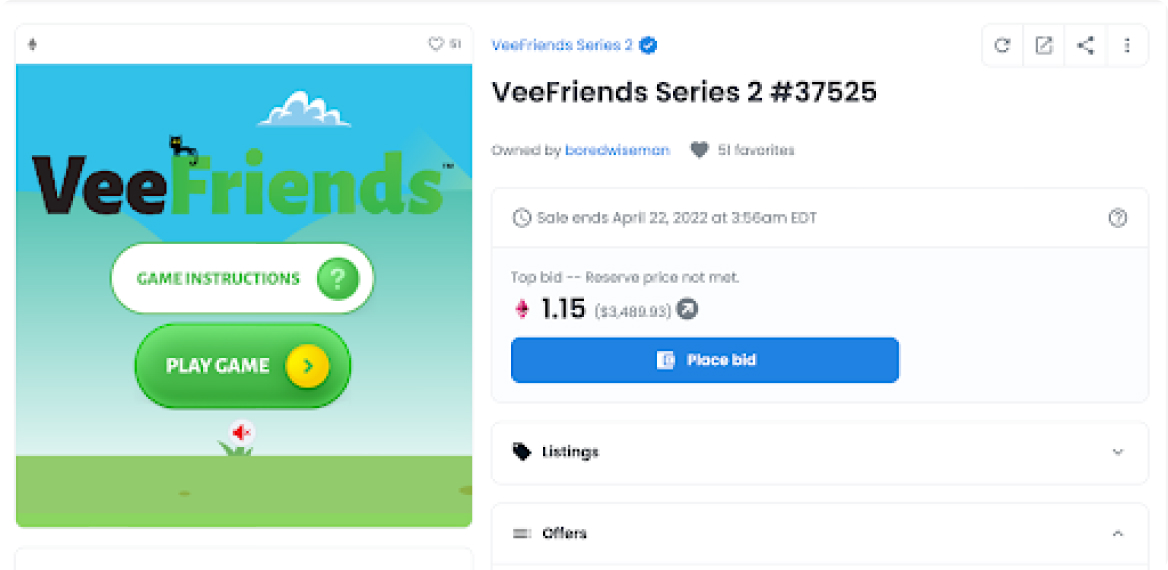
The moment you’ve been waiting for! Now that you have your wallet set up and funded, it’s time to purchase your first NFT. There are several NFT marketplaces to choose from, but the most popular is OpenSea, so we’ll start there.
If you’d rather follow along with a video walkthrough, click HERE.
- Go to the OpenSea website. To “log in”, you’ll be connecting your MetaMask wallet, which will allow you to purchase an NFT with ETH from your wallet, identify you as the owner of the NFT and securely store your NFT. To do this, simply click the wallet icon in the top right corner and follow the prompts.

- Now that your wallet is connected, you are able to browse all of the NFT collections listed on OpenSea and place bids to purchase. From this point on, it is very similar to any online purchases you have made before, but instead of using US Dollars and signing in with your email, you’re using ETH and connecting your wallet.